Dragon Ball Kai is truly like no other Dragon Ball anime to date, or for that matter, really like any other anime in general. The series is a “refreshed” version of the Dragon Ball Z TV series, in which the series has been updated to high-definition, although for the most part it uses the same footage from the mid-to-late 1980s. The series is touted for following the manga much closer than that of its original anime adaptation. In fact, the first 194 episodes of the original Dragon Ball Z TV series were condensed down into a mere 98 episodes, resulting in nearly 100 episodes worth of material being cut out.
Now we’ve done various dissections of the series, from our thorough episode pages in the “Episode Guide” to our feature examining the conceptual idea of the series and its eventual fall in early 2011, but there’s one intriguing aspect we haven’t touched on too much – Just how did they remaster the original Z footage and what exactly went into making a single episode of Dragon Ball Kai?
Luckily for us, some of this information was printed in the first three Dragon Books that came with the series’ Blu-ray box sets. However, we of course are supplementing this with other information we’ve gathered, along with our knowledge of the modern and traditional animation processes. This will hopefully shed some light on just how Dragon Ball Z was brought into the digital age.
The Basics
Before we jump straight into anything with too much detail, here’s a basic walk through of the standard production process for an episode of Dragon Ball Kai. This production path is a slightly modified version of the one that appears on page 9 of the Dragon Book included with Dragon Ball Kai Blu-ray box set #1.

As with most productions, the series truly starts with the finalization of the storyline or plot. From there, the specific scenes from Dragon Ball Z required to create this plot are found and a lower resolution “rough cut” of the episode is created. These scenes are then scanned and converted from their original 16mm film masters into high-definition (HD) digital masters which are then color corrected in accordance with the set color palette. These HD masters are then checked for any damage or excessive grain, which are removed, and any scenes requiring re-animation are selected. While the HD digital masters are being edited and cleaned the production process moves on with the music selection and voice recording, which are both based around the “rough cut”. Once all of the video editing is complete, the audio tracks are all combined and added to the completed remastered video, resulting in the final product as seen on TV or released on home video.
Step 1-A: Plot Development
Plot Preparation and Editing
This first part of Step 1 involves the development of the episode plot by the production staff, consisting of producers and planners from Toei Animation and Fuji TV. Toei Animation also hired two consultation companies, Yomiko Advertising and Caramel Mama, to help with the series production. Caramel Mama was previously hired by Shueisha to assist in the production of the daizenshuu guide books, and is credited as a “Series Organizer” responsible for assisting in developing Dragon Ball Kai’s overall plot. In contrast, this is the first time Yomiko Advertising has been hired to assist with the production of anything Dragon Ball related and is credited for supplying producers to provide series production guidance.
The production staff first creates a rough idea of the plot for the episode based on the manga and existing footage, in essence determining the main plot points to be covered in each episode. From there they edit the plot together, figuring out how they can make these main plot points flow together as well as possible using original supplemental footage. In addition to the main production staff being credited for this, the original script writers and directors from Dragon Ball Z were credited per episode used within Dragon Ball Kai.
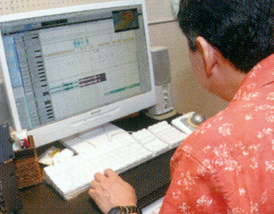
Offline Editing
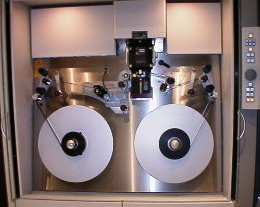
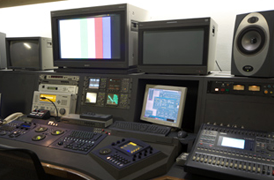
Once the final episode plot has been determined, the animation staff starts compiling the necessary Dragon Ball Z footage for each episode. Q-TEC, a post-production company specializing in film video transferring and restoration, was hired to complete the remastering of the original Dragon Ball Z footage for Dragon Ball Kai. In what is called “Offline Editing”, each individual frame from the original 16mm master films were digitally scanned using a Spirit DataCine motion picture film scanner. This device is able to transfer 16mm and 35mm film in real-time to one of numerous high-definition television standards.
 |
 |
Once all of the required footage has been digitally scanned, it is re-arranged from the order it was scanned into the approximate order it will appear in the final cut. From there the raw high-definition footage is edited down into a rough cut of the episode, which includes any transitional effects and is essentially how the episode will look in its final cut. When the rough cut is completed, a copy of it is saved at a much lower, more manageable resolution. A linear timecode (LTC) is also added to help synchronize all other post-production processes.
The lower resolution rough cut is sent back to Toei Animation to be used for all additional post-production processes (background music, voice recording, etc). The high-definition rough cut is kept by Q-TEC to be remastered and at this point both rough cuts are exactly the same.
Step 1-B: High-definition Remastering
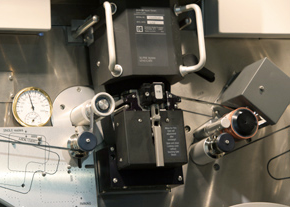
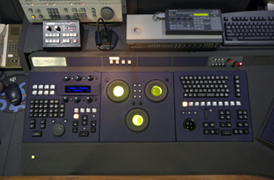
While Toei Animation begins work on other aspects of the episode, Q-TEC finally starts working on the high-definition remastering of the episode. The original film masters of Dragon Ball Z, all of which are nearly 20 years old, have been slightly damaged over time causing degradation of the colors and physical damage, such as scrapes and tears to the film itself. The first corrective measure taken is to adjust the faded colors to the new color palette. Q-TEC accomplishes this by using Pandora’s Pogle workstation which is linked directly into the Spirit DataCine motion picture film scanner, controlling the telecine transfer process. The Pogle workstation contains color corrective software which can be used “on the fly” as the film is being scanned or following the scans completion. The user can also create a unique color palette and save it for repeated use by the software.
 |
 |
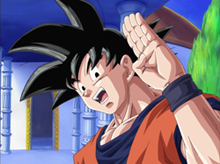
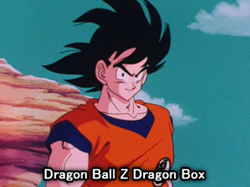
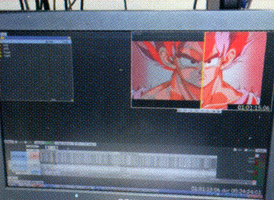
Unfortunately, it’s never been stated as to what this new color palette is actually based on. Many fans assume they were trying to update the colors back to their original color palette, but all indications really seem to point toward them simply updating the existing colors to make the series look more “new and modern”, rather than “faded and old” similar to the Dragon Boxes. In the first Blu-ray box set’s Dragon Book, a picture comparison is included showing how a shot of Son Goku preparing to battle Vegeta in episode 13 of Dragon Ball Kai had been remastered from the original film master.
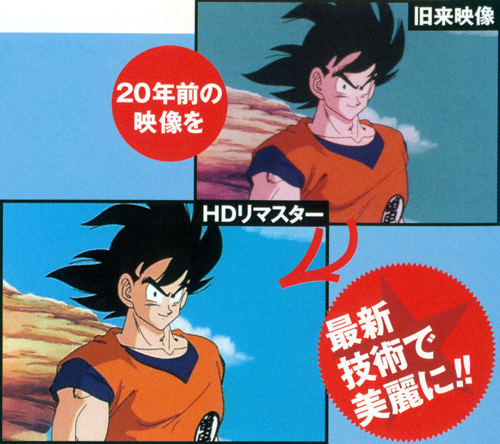
While this comparison looks great and all, it is actually quite misleading. To help show you what I mean, I’ve put together a little comparison of our own. To be as fair as possible this comparison utilizes the exact same shot of Goku, although each comparison image was taken digitally straight from its actual source (DVD and Blu-ray). While you should never compare video production to print production, this comparison was fundamentally done to show the significant differences between the images in each medium. It should be stressed that this discussion has nothing to do with the broadcast’s original color palette and is merely a comparison between the differences shown. That said, the only alterations made to these images have been to resize them, with no color alterations being made at all.
 |
 |
You’ll notice that the background from the actual Blu-ray release image is still green, especially in comparison to the image printed in the first Blu-ray box set’s Dragon Book which is clearly blue. In fact, looking at the RGB values we see that the background colors printed in the Dragon Book are 30% different, while those shown on the actual releases only have a difference in background color of 8%. On top of that, the green RGB values between the original footage shown in the Dragon Book (top right) and the Dragon Box footage only differs by 1%. So it’s quite clear visually, and especially based on the numbers, that the comparison printed in the Dragon Book was doctored in some fashion. Even if it was there original color baseline, it’s obvious they never quite got there.
Moving on from the color correction, Q-TEC then begins removing all of the dust, grain, and damage from the film. First an automated program is used to remove all of the unwanted grain. It is not specifically noted what type of noise filter was used or what any of the settings were, but it does appear that they did this in such a manner that there was very little loss of detail. They then manually scan through each individual frame to remove all of the film damage, such as dust, tears, and scratches. The program used does help identify such damage, but the majority of this process is done with the human eye, making it quite a difficult and lengthy process.
 |
 |
Step 2: Video Check
Following the remastering process the main production staffs from both Toei Animation and Fuji TV decide which scenes require re-animation. We’ve seen various examples throughout the series of why certain scenes were chosen to be re-animated, but the Dragon Book had a simple answer behind the basis of their reasoning: “To make it more appealing to viewers, removing things that might be unsuited for the average household.” In this case, we can pretty much assume that when they use the word “average” that they’re talking about who is actually watching the show, specifically children. So it’s no surprise why certain scenes were edited to remove some blood or male genitalia.
 |
 |
The Dragon Book does note a few reasons for certain scenes being re-animated, such as the removal of “extreme changes in brightness” and in general just “replacing cuts that have degraded over the years with refreshed images”. To elaborate a little more, here are a few reasons why we’ve seen certain scenes re-animated in the series:
- Update ki attacks with modern effects.
- Remove bright flashing and strobe effects.
- Correct animation errors and inconsistencies from the original series.
- Extend certain fullscreen scenes horizontally to ensure key elements properly fit within the cropped widescreen framing.
- Edit scenes that are deemed to contain unsuitable or obscene footage.
Once these scenes have been identified, Q-TEC sends the remastered footage to Toei Animation, who actually handles the re-animating internally. The majority of the re-animating for Kai was handled by TAP, the Philippines branch of Toei Animation, which according to Toei’s corporate website currently handles approximately 70% of the company’s workload in the animation, background, and finishing processes.
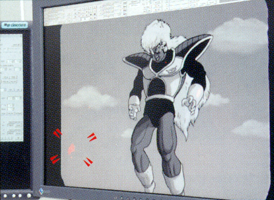
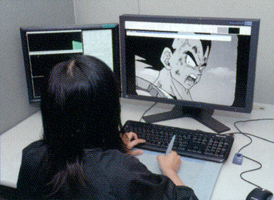
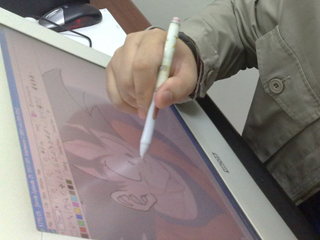
These scenes were uploaded to Toei Animations internal network, allowing the animators at TAP to access them through their high speed network system. The animators would then import the footage into the appropriate RETAS Pro HD software which is loaded on a Wacom LCD tablet. RETAS (Revolutionary Engineering Total Animation System) is a 2D animation software bundle capable of handling the entire animation process from digitally drawing or tracing to exporting, and is considered to be a leader in Japan’s anime industry. Each individual frame from the given scene is then traced, with any alterations or corrections to the line art being made at this time.
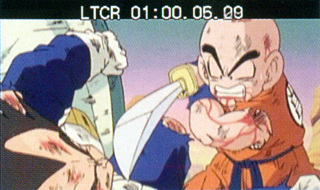
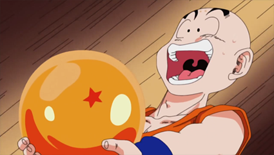
Once the entire scene has been traced, it is colored in based on the color palette provided. Following this, the traced scene is placed over the scene’s original background, or one that has been redrawn based on the scene’s original background. In some cases the background is completely redrawn, such as with the re-animated Kuririn image shown above. The finished re-animated scene is then exported into an appropriate file format and sent back to Q-TEC to be re-inserted into the episode.
Step 3: Sound Work
While Q-TEC is busy remastering the footage the appropriate Toei Animation staff is hard at work with the sound aspects of the episode. The first step on the sound side of things is recording the dialogue, which is recorded at the Toei Audio Visual Art Center (TAVAC) recording studios in Shinjuku, Tokyo.
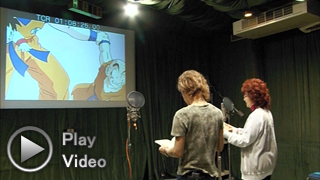
The voice actors (seiyū) are given the episode script and they perform a test reading while the episode is played from a projector in the studio. As you’ll recall, this footage contains a linear timecode and is not the final product. When the test reading is finished, the seiyū finally step up to their microphones for the actual dialogue recording. Luckily for us, the special DVD included with the Kokoro no Hane (Kai’s second ending theme) CD single included a sneak peak of Masako Nozawa (Son Goku) and Ryō Horikawa (Vegeta) showing “Team Dragon” how they recorded their dialogue for Dragon Ball Kai episode 13, which you can watch below. I will note that this is not the original recording session for that episode.
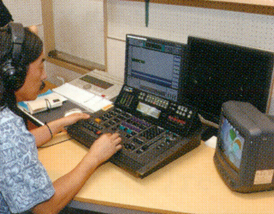
As you may have noticed, the dialogue recordings are done without any music playing, which is the next step. Following the completion of the dialogue recording, the audio and video files are sent to the sound supervisor, Yukio Nagasaki. Using the video as a reference, he lines up the dialogue audio with the footage the best he can using non-linear editing software. Once that is finished he imports the background music tracks, placing them where he sees fit.
 |
 |
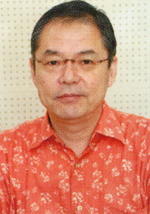
The files are then sent to Hidenori Arai, who has been the original sound effects designer for every DragonBall anime series, including both the episodes and movies. Using some of the series’ original sound effects (in stereo), along with some newly recorded ones, he watches the episode and adds sound effects where necessary. Arai does note in the Dragon Book that he created the sound effects for Dragon Ball using the ARP 2600 and Roland SH-101 analog synthesizers.
 |
 |
Once the episode’s audio has been finalized, everything is sent back to Q-TEC to be combined with the newly remastered footage.
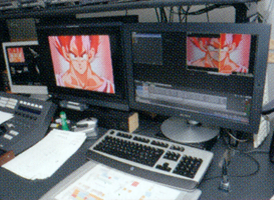
Step 4: Online Editing
With all of the episode’s individual components complete, Q-TEC begins the final step of the video editing process, known as “Online Editing”. At this point the timecoded lower resolution video used by Toei Animation is replaced with the remastered footage which as at the full or “online” resolution. This online edit is checked against a copy of the offline edit to verify that everything is correct and frame-accurate. Once the online edit is completely conformed to the offline edit and audio, the episode must be trimmed down into a 16:9 widescreen format in order to conform to Japan’s digital broadcasting standards.
Trimming
Using a masking tool, the online editor adds letterboxing to the fullscreen video, creating a 16:9 widescreen version of video without compromising the original fullscreen version. The online editor then carefully adjusts scenes and frames to minimize the amount of vital footage from being cropped. Any additional panning or zooming effects are also added during this step.
 |
 |
Formatting
Once all of the trimming is complete, each version’s (fullscreen or widescreen) respective pre-title card, opening, title card, eyecatch, ending, and next episode preview are inserted. At this point each is in their raw form with no credits or logos. The online editor then begins formatting the episode, adding the “Dragon Ball Kai” and “Dream 9” logos to the eyecatch, the finalized episode title to the title card, the finalized next episode title to the next episode preview, and finally, with the help of a Toei Animation producer, the episode credits to the opening and ending themes. Each of these formatting additions is created on a separate layer placed over the video, meaning that each can be turned off, allowing the editor to make a specific layer not visible in the final product if so desired.
 |
 |
Step 5: Broadcast and Home Video Release
With the formatting complete, each individual version of the episode is exported into the desired digital video format. In total, there were actually four different versions of each episode, each with the following encoding properties:
- Fuji TV Digital Broadcast – 1080i
Resolution: 1440×1080 Anamorphic Widescreen / Frame Rate: 60 fps (interlaced) - Fuji TV Analog Broadcast – 480p
Resolution: 640×480 Letterboxed Widescreen / Frame Rate: 29.97 fps (progressive) - Blu-ray Release – 1080p
Resolution: 1920×1080 Pillarboxed Widescreen / Frame Rate: 23.97 fps (progressive) - DVD Release – 480p
Resolution: 720×480 Anamorphic Widescreen / Frame Rate: 29.97 fps (progressive)
You’ll note that the Fuji TV digital broadcast is formatted in 1080i and set to 60 frames per second. This frame rate is quite misleading, as 60 interlaced frames is actually the same thing as 30 progressive frames. Regardless, this interlaced format is actually the NTSC digital terrestrial television standard which is used in both Japan and the United States. All other episode encodings were done to their specific media’s standards. Of particular note is the Blu-ray encoding, which is noted as being encoded in widescreen, although it contains fullscreen video. Unlike DVD, Blu-ray supports true 16:9 resolutions, meaning widescreen video can be displayed non-anamorphically with square pixels. Therefore pillarboxes are combined with the original fullscreen video and encoded at a 16:9 widescreen resolution, making Blu-ray non-anamorphic.
With the digital encodings complete, Q-TEC then sends these final versions of the episodes off to Toei Animation. From there, Toei Animation would distribute the appropriate TV version of the episodes to each regional Fuji TV affiliate station for broadcast. At some point they would also send copies to Happinet, the company responsible for creating and distributing the series for home video release on DVD and Blu-ray.
And there you have it, the beginning-to-end production process for each episode of Dragon Ball Kai!